Hi all! Our monthly stamping group got together last night and it was a lot of fun! After reading my back issues of Stampin' Success I had a new idea for our party….I demonstrated a couple of ideas and then had 4 tables set up -- each with a 10 minute or under project. I had a lot of fun finding ideas for the tables and hope that the ladies enjoyed making them!
To start off our party I demonstrated these 2 bundles in the Occasions Catalog:
1. The Geometricals Bundle
I stamped the sentiment with Versamark and then embossed with white embossing powder--then sponged over the top with Smokey Slate using a sponge dauber. I then stamped the triangles in Daffodil Delight, Melon Mambo and Coastal Cabana and punched them out. Add a few rhinestones and you're basically done! Thanks to Mary Brown for her card design that I totally cased!
2. I used the Petite Petals Bundle along with the Chevron Border Punch to make this lattice card designed by Deb Valder at
stampladee.com. Love how the chevron punch makes such an easy and cute lattice!
Lastly I showed the ladies how to fold these little "carrot treats" and how to make the topper with our new fringe scissors!
You can make the carrot out of any size square paper--this is made with a 5" square. Fold it diagonally then open it up and fold each side into the fold line to make a kite shape. Fold back the top part of the kite and then make into a triangular shaped container. Glue the flaps together. I put my candy in a small cellophane bag and then put the topper in and closed it with some baker's twine tied around it. Thanks to Brenda Church for this idea!
This was one of the projects I set up (minus the candy). Here were the other three 10 minute or under projects:
First--a marker card--the design on the card and card flap were created by using the brush tips of the markers--I used the new in-colors.
The sentiment is from Yippee-Skippee. The inside has a birthday greeting and the cake from the stamp set "Make a Cake" that is on sale this week.
We made a card using the Happy Watercolor set and some card stock vellum butterflies.
Ink up the "blotch" stamp and then stamp it 3 times without reining. Stamp the flower with black stazon over the splotches, add your sentiment and then punch out your butterflies attach with a glue dot and add your pearl. I offered this in either Coastal Cabana or Wisteria Wonder.
Lastly--I have a bit of in-color supplies that are going to be retiring at the end of May--so we made a white flower punch card with the in-color paper and matching dahlias and ribbon. The d.s.p. is the patterned acetate from the Quatrefancy paper in the main catalog. I used the 3 sizes of flower punches--Blossom, Pansy and Petite Petal punch.
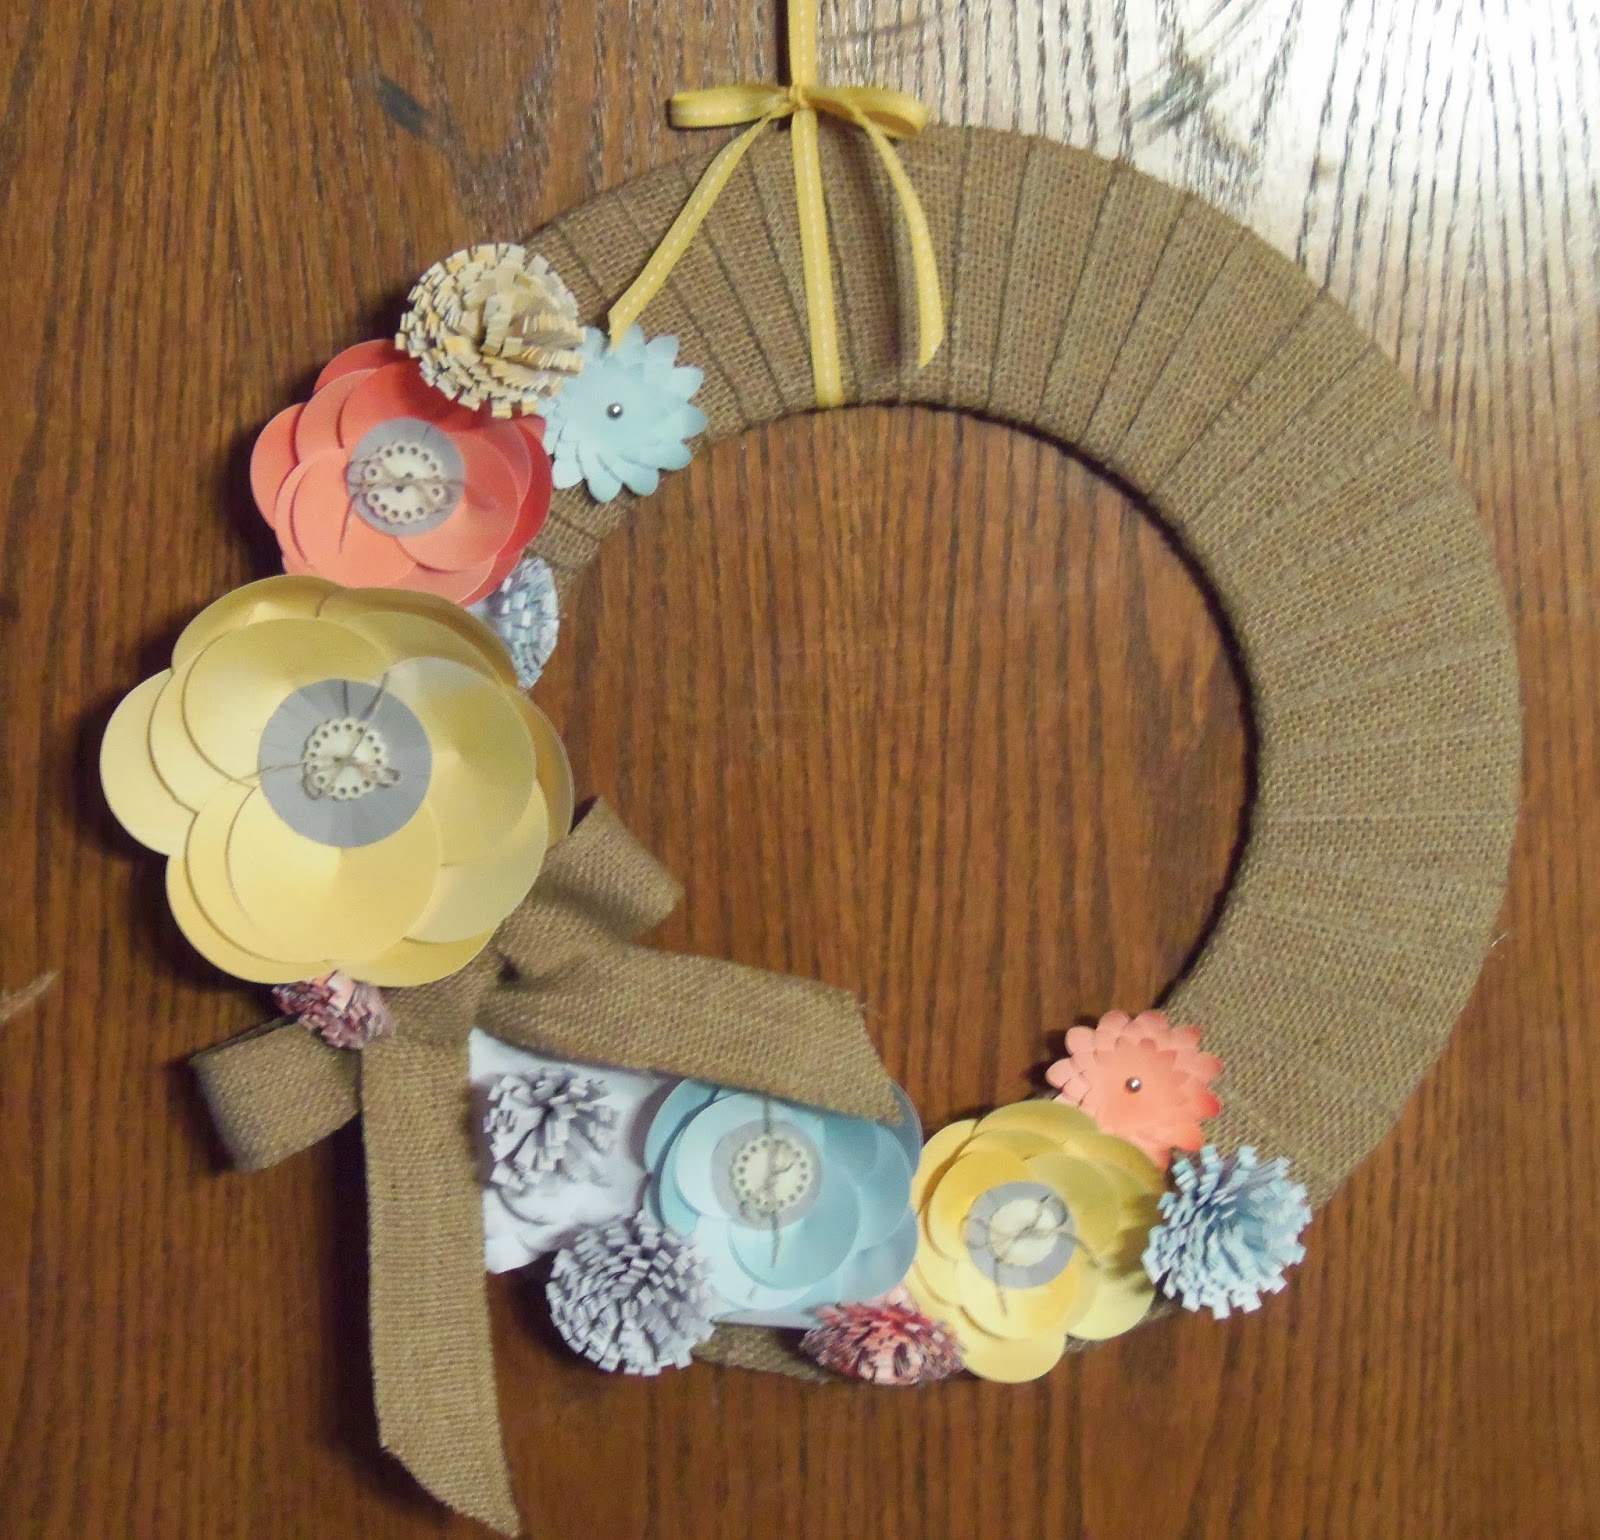
I'll be back soon with my Burlap and Blossom wreath…..