Sunday, November 9, 2014

It's the Most "Wonderful Wreath" Time of the Year!

Love the simplicity of this card.....


and I didn't even do a good job of matching up the 2nd layer of leaves!  =-)  I was surprised when I used the Filigree Frame embossing folder that it was full card size and you really can't cut it down much over an 1/8th of an inch--still love it though!

I'm having people over for "Stamp Set of the Month" and let me tell you--it's a lot of fun, but it sure makes me want to get my basement finished and a stamping area set up down there--then I don't have this to contend with.....as much.


Okay--we'd still have the mess, but at least I wouldn't have to go up and down the stairs a bazillion times to get things I forgot!!    Until next time!


Tuesday, November 4, 2014

Holiday Home Open House

I can't begin to tell you how much I like so many of the sets in this year's holiday catalog....Holiday Home is up today and here's what I made to show the diversity of this set at our last party!

This card was totally cased from our demo magazine--cute fall card and really not too time consuming to create!  

The next card is a Christmas card that was cased from someone who made it as a  Founder's Circle swap.  I've seen it a couple of different places and really like the non-traditional colors--pear pizzazz and lost lagoon are just yummy together!


I love the use of washi tape and the dazzling diamond glimmer paper on this card.  When I get the name of the card designer I'll let you know!  In the meantime.....


Sunday, November 2, 2014

More Fall Fest Fun!

Here are a couple more cards that I made using Fall Fest!  Initially I wasn't interested in ordering this set, but who can resist those cute little leaves--and the matching framelits?  Too, too, cute!


The tutorial for this card is on Julie Davison's blog here.  Really a quick and easy card to make!


I fell in love with this card the minute that I saw Sandi MacIver's video here on it!  It uses the baby wipe technique and one of my favorite sets from the holiday catalog, Wonderful Wreath.  

I'll be back soon with more!  In the meantime, 


Wednesday, October 29, 2014

Star-Filled Christmas!

I put off for quite awhile getting the star framelits....I didn't really need them did I?  And then I saw all the cuteness being created using those stars and I couldn't resist any longer!  Here are a couple of Christmas cards I made using the framelits and the star embossing folder and the new star border punch.   Is that Kraft paper not totally awesome?!!  And I really can't say enough about how much I love the Under the Tree specialty paper!  Wowzers!


Here's the same card with a different embossing folder--On Point--from the holiday mini:


I cased this from Lee Conrey of stampingleeyours.blogspot.com

I just got the dazzling diamond glimmer paper in my last order and it is fun to work with!  The texture of it is a bit smoother than the original glimmer paper I think.  I saw a card like this and just picked up a piece of soft suede card stock that I had laying around, added the stars using the stars mask--then the dazzling diamonds glimmer star.


I'm pretty sure I cased this from someone also....yep--ZoKris.  Here's the original card.  

I'll be back sooner rather than later!  


Monday, October 27, 2014

I ~heart~ Fall!

Hi all!  You'd think the way I HAVEN'T been posting that I wasn't stamping....but I've got tons to share.  Life just got in the way!  A couple of weeks ago I had a sudden attack of numbness on my right side and ended up in the hospital for a few days checking out my heart and brain for signs of stroke or a heart blockage.  Fortunately--all was good.  Just need to add an aspirin to my morning meds.
 Now I'm into one of my busiest weeks as a teacher--parent-teacher conferences!  But I do have some cards to share:

Here's my take on the ever popular turkey punch art that is pretty hot right now- and easel card:


I own the Mingle All the Way MDS, but could not get it to download so I just typed out the verse as it is perfect for this punch art created by the bird and owl punch!

Love, love, love cards that move and this was one that I shared at the last party I demonstrated at.  I followed the tutorial here on Dawn Olchefske's blog.


This is the cover --used the stamp set "For All Things" and here's the inside:


I'll be back tomorrow to share some more cards!  


Sunday, October 5, 2014

Punch Art Pup!

Is this not an adorable punch art puppy dog?  I saw the tutorial for this on Dawn's Stamping Thoughts awhile back and knew I had to make it!  I have a friend at school that was due to have a baby any day and was hoping it was a boy (nope it was a girl) so I could give her this card!  I searched for  a cute sentiment to go with it and found this on my shelves....it's from the set "Extra Nice".  Hope you like!  I linked you up to the tutorial if you want to check it out!
           

Now, I'll have to wait on someone to have a boy so I can send it!  =-)  


Friday, September 19, 2014

A Quick Hello with #Hello!

Here's a card that I case'd from somewhere on the internet....unfortunately, the designer doesn't have a watermark* so I can't give credit where credit is due!  I'm really loving the in color Lost Lagoon...such a rich color (as are all of the new in colors)!   I used the Tiny Triangle embossing folder, Lost Lagoon ribbon and some silver glimmer paper.  I think this card came together in 5 minutes or less!  That's a wow for me!


I had trouble getting the lost lagoon looking true to color in my photo!  Still working on the lighting in my new photo box--need to do a bit more research!  Have a great Friday tomorrow!


Wednesday, September 17, 2014

Fall is Coming....Fall is Coming!

One of my favorite times of the year is Fall--you know--the days that are not too warm and not too cool with the smell of falling leaves in the air.  We had just a sniff of Fall last week--of course the weather is back up in the 80's now, but it made me anxious for its true arrival.

I've been trying to stamp more regularly now that the school season is in full swing and to meet one of my goals (see my post from a few weeks ago) I'm participating in a sketch site....and I may have already blown it, by not being clean and simple enough (I sort of read that part after I created the card).  Ha!  Anyway here's my card for this sketch:


I used the age old "Lovely as a Tree" stamp set which continues to be a classic year in and year out!  I added some fall leaves to my trees with my blendabilities.  My banner is decorated with leaves from the Fun Fall framelits.  I used sahara sand, tangerine tango and crushed curry--pulling those colors from the Color Me Autumn designer series paper from the holiday catalog.  The sentiment is from the stamp set "For All Things."  Well-it may not be clean and simple, but I did follow the sketch....sort of....and I do like the card.  =-)     


Monday, September 15, 2014

Stamp Set of the Month...September Style!

Whew!  I feel like I once again have control of my life now that school is started and I'm back in the "school routine."  It's always a bit exhausting to change my routine from summer back to work.  I think I'll get in my stamp room and get some work done, but by the time I get home from school (especially the first few weeks) I'm exhausted.  =-)

Anyway...I finally have a date and stamp sets picked out for the September Stamp Set of the Month--Yippee!  For both stamp sets we will be making 3 cards and a 3-D item.

Your choices are:  "Four Feathers" from the new Holiday Catalog.  This set also can come with framelits for the feathers--so the cost is $20 for just the stamp set--or $25 for the stamp set + the framelits.  You can find this set on page 42 of the the catalog, but here's a sneak peek at possibly one of the cards we will be making:


The other set is Pictogram Punches which is from the main catalog page 89.  It coordinates with the new 3 pack of mini punches called the "Itty Bitty Accents" punch pack found on page 222.
Here's a peek at a card using that set...not sure if this one is going to make the cut or not.


Cost for this stamp set is $20 for the stamp set, 3 cards and 1 3-D.  My dates for these are Sunday afternoon, September 28 and Monday evening, September 29. Hope you can join me!  Please let me know by Saturday, September 20th if you are interested so I can get stamp sets ordered!

I've got some other great class ideas that I'm going to be scheduling between now and Christmas--so stay tuned!  


Monday, August 25, 2014

August Party Post.....at last!

Hello Friends!  So sorry it took me so long to post these pictures.....but the start of the school year is just crazy busy and to top it off--Dan's 2nd cousin who is in college here in McPherson took the couch out of my stamp room and that meant rearranging the whole room!!  I'm so excited because all I need are a few more lights and I can have parties down there!  Yippee!

Here are the cards that I demonstrated....

1.  Sea Street--this was a total case of a card that I saw at another demonstrator's house (she got it in a swap at convention).  The designer is


Here it is opened--it's a tri-fold from a piece of 12 x 12 paper cut at 5 1/2" by 12".  Scored at 4 1/4 and  8 1/2.  I added texture with the arrows folder to the front panel.  This is a great card to hold a gift card or money.

Our next card featured the stamp sets Kinda Eclectic and Tape It.  I case'd all the cards that I saw from one of Convention's Make and Take projects.


I used a Sahara Sand base, with a layer of Mossy Meadow under the whisper white.  I didn't have the Moonlight designer paper pack so I improvised with Tape It stamped in Blackberry Bliss. I added some linen thread to my Tangelo Twist butterfly.  This is a really neat set and I look forward to making some cool cards with it!  Oh--I also colored the rhinestones with the dark Rich Razzleberry blend abilities pen to color them.  As you can tell this used most of the new in-colors.  Poor Lost Lagoon was left out, but no worries--it's a beautiful color and I know I'll use it a lot!

Next was a card using the Fun Flower punch and matching single stamp (which I'll put in when I get home tonight).  Crumb Cake base and Calypso Coral ink--love that combo!


Last I wanted the ladies to play with the blend abilities so I showed them this card -- and then we played....


We also had a note card for a make and take that used the Speech Bubbles framelits and the Just Sayin' set.  Unfortunately I forgot the wash tape....but the ladies did a great job improvising with the Tape It set once again!!


I got this right off Mary Fish's blog Stampin' Pretty--a total CASE.  I'll be back and add some details tonight and correct some things!  Have a great day!


Friday, August 15, 2014

Setting Some Stamping Goals!

I love being a Stampin' Up demonstrator, but if I'm truly honest with myself---I'm my own best customer.  So I've set some goals for myself to try and grow my business and to do a better job creating on my own:

Goal 1 - Set up a Facebook Stampin' Up page--done (no followers yet)
Goal 2 - Figure out how to take better pictures - working on it--have a photo box ordered and on the way
Goal 3 - Participate in some sketch/design challenges
Goal 4 - Blog on a more regular basis

During the course of this next year--I'm going to try and post at LEAST once a week a card or project that I've designed all by my little lonesome.  I don't think I can give up CASEing cold turkey.

So let the Project begin….

Step 1--Find some Sketch sites and try to create some cards using their sketches.

Step 2--Figure out the techy stuff so I can post to their sites…without out totally messing up everything!

Step 3 -- Set up some classes to try and increase my business.  I have ideas...but can I follow through with them?

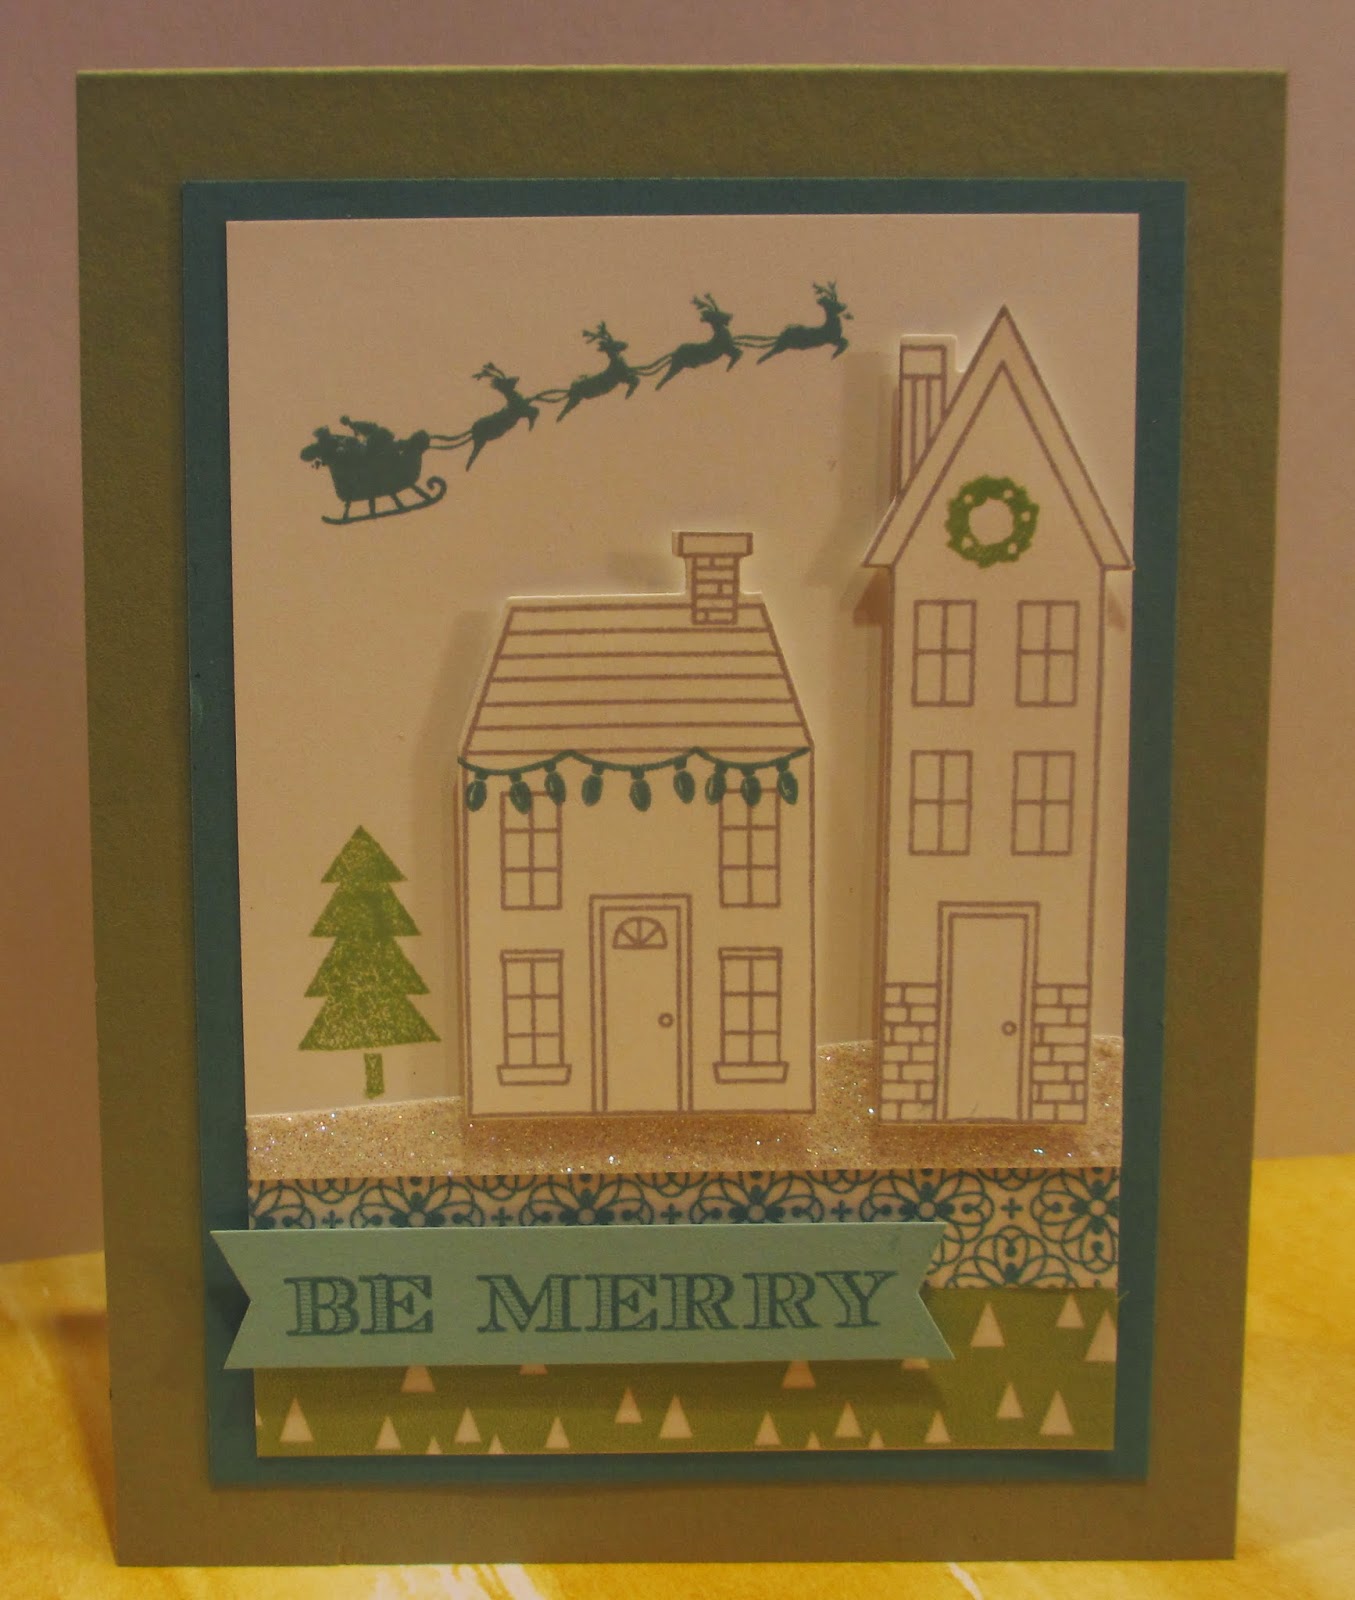
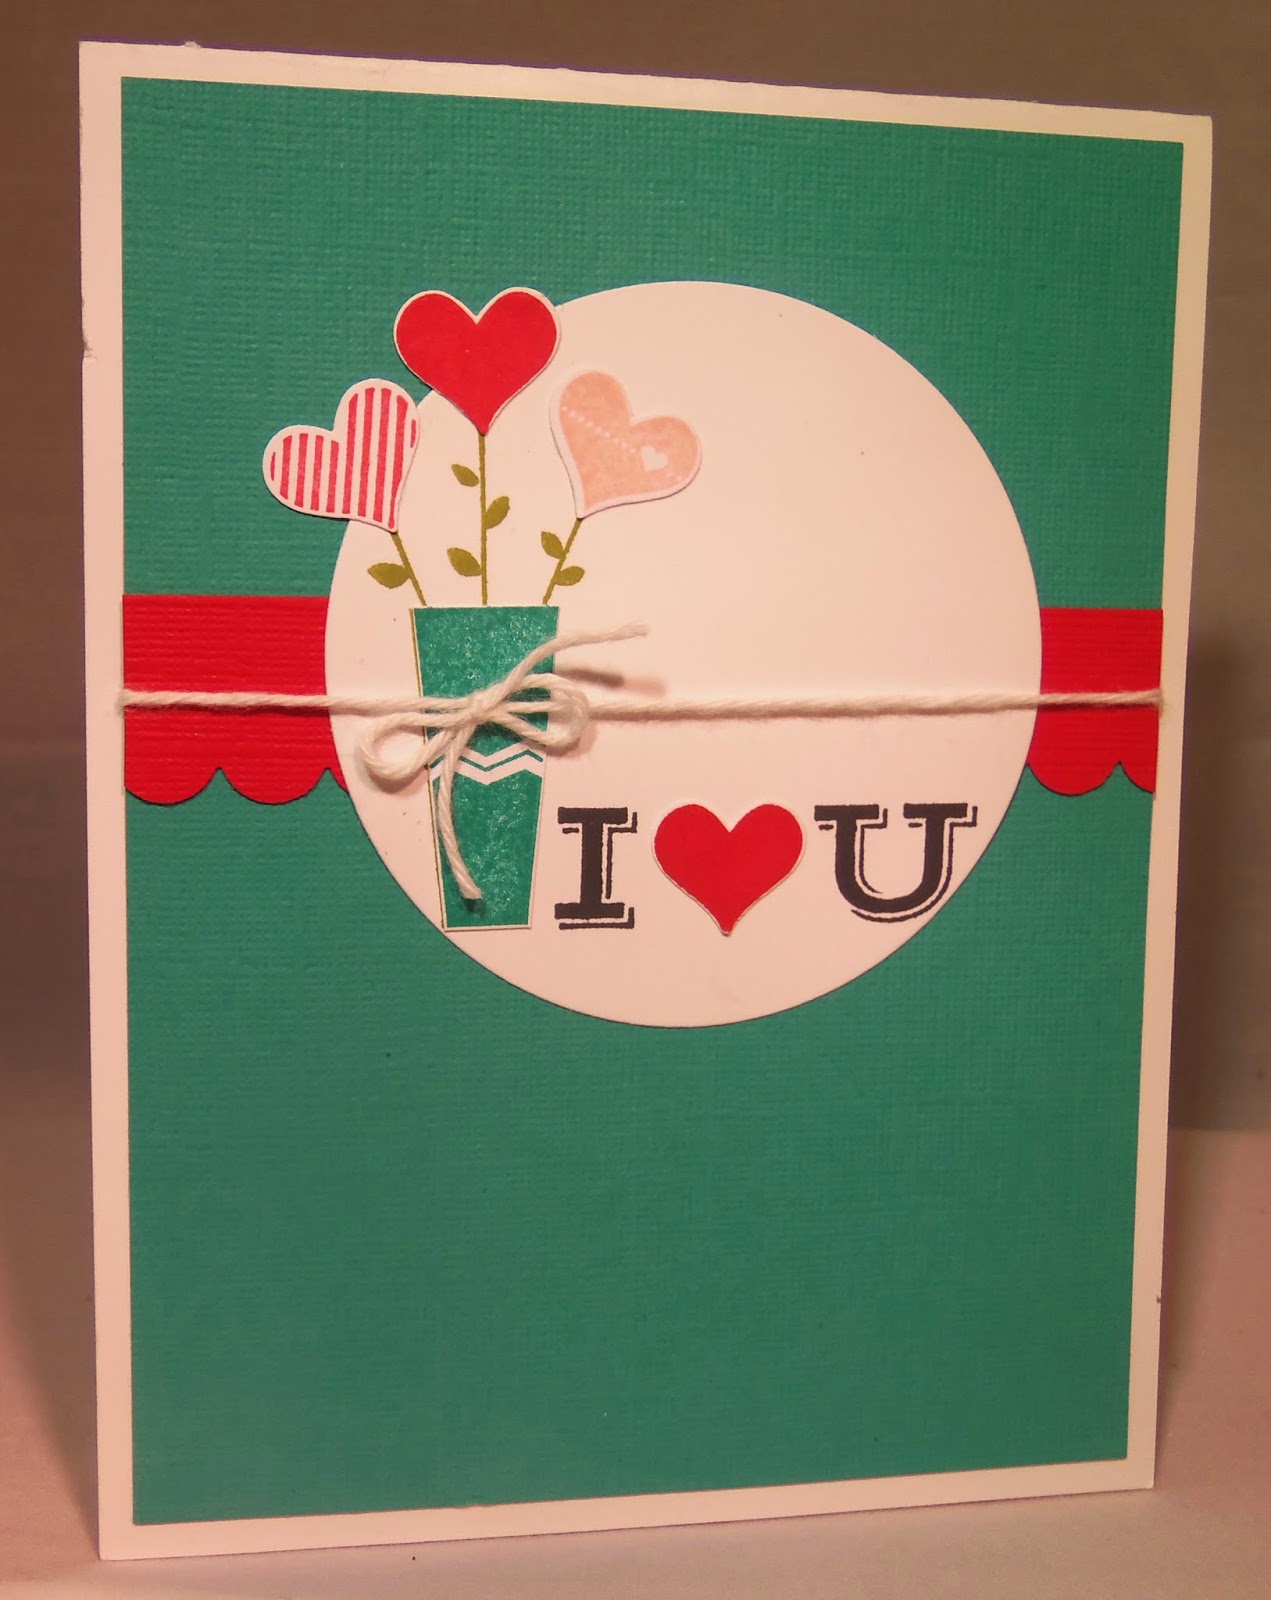
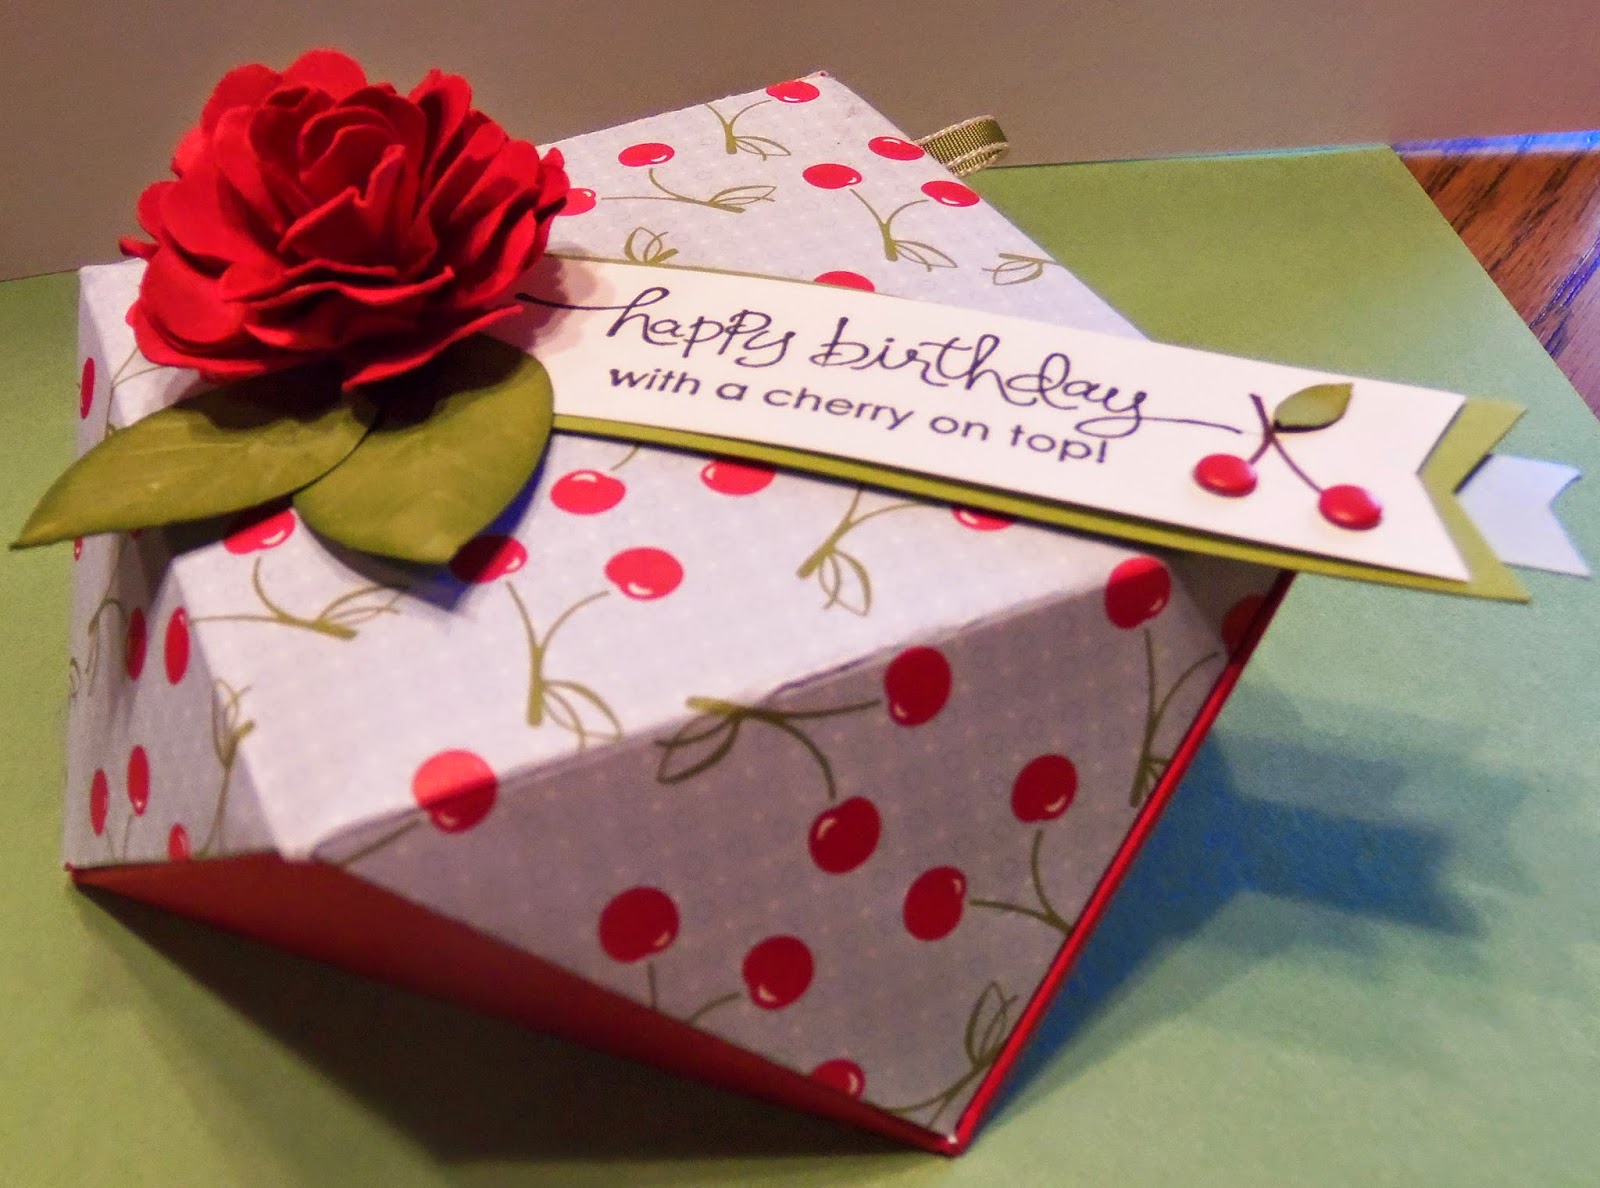
Okay--enough about that--here's a card that I made recently for a swap that I participated in through VC Rocks:

I used paper from the All Abloom pack, For the Birds (colored with a blender pen), and the sentiment from Love and Sympathy.  Can you see my dots from the embossing folder?  I did that by putting the paper in the folder and pound it with a hammer wherever I wanted the dots to be!  Not sure why I didn't take a picture of the inside!!  I had it all fancied up too!  Now I'm off to complete some of my goals before I turn old and gray--oh wait, I'm already there!  Ha!


Tuesday, July 29, 2014

Happy Birthday….with a "Cars" flair

Last week we celebrated my grandson Brody's 3rd birthday--such a special day for this blessed boy!  I don't know about you, but grandchildren are part of what makes getting older all worth it for me!

Brody is in love with all things to do with "Cars"and "Planes."  So when I saw this card that Heather Summers' mom created I knew I had to CASE it.  There weren't any directions with the card so I had to improvise, but I'm so thankful for the idea (see it here) and was pleased with how it turned out!


Above is the front of the card and here's the inside…

Hope you enjoy!  

Friday, July 25, 2014

July Blog Hop - Fancy Folds and More!

Welcome to the July VCRocks Blog Hop—we may be small in number, but I hope you enjoy what you see!  I’ve got both a 3-D item and a card! 

My upline demonstrated this idea at our last party and I knew right away I had to make one for this blog hop!  It’s a little gift box made with the envelope punch board.


You cut out 2 envelope pieces (that coordinate) for any square card—mine was for a 3 x 3 card, so both of my papers were cut and scored as directed on the punch board for that size card.  After they are punched and scored you need to score on your scoreboard at 3/8 inch along all four sides of both pieces.  Fold your score lines and attach together with sticky strip and decorate!  Don’t forget to leave a flap that’s not glued—so you can get in and out of your box.  I attached a little ribbon loop to mine so it’s more easily opened.


I used some very old designer paper that I still love—it coordinated with the set “Tart and Tangy.”  I made my little cherries from candy dots and the sentiment is from a retired set, “A Word for You.”  My flower is made from the pansy punch – 5 of them hooked together with a brad, saturated with water then scrunched to for the flower—let it dry and it keeps its form.


My card is made using a tutorial by Dawn Griffith found here.  My son’s birthday is this week and this was perfect for him.  


I used the newly retired dsp paper and got my colors from the paper—soft suede, coastal cabana, so saffron, tangerine tango, and very vanilla.  I love all the details I was able to add and yet keep it a masculine card!  Here it is opened to the first folds:

And the next:


And finally all the way open:

Thanks for looking!  Hop on back to the VC Rocks Blog to get to the next spot of creativity!  I'll have to add more details later….got food poisoning yesterday and I'm not feeling very good yet!


Wednesday, July 9, 2014

Happy Anniversary….

Hi all--I'm on vacation in Northern Indiana so I'm posting this from there….this is the card I created for my parents as they celebrated 58 years of marriage in early June.  I used the first photopolymer set that SU offered to create the words in the middle.  The card front was actually a swap that I received a long time ago….


And as you open it--obviously, the knot ties!


I'm looking forward to having some stamping time when I get home from vacation!