Monday, March 28, 2011

Soooo Tired!

I had high hopes of stamping tonight, but it was not to be!  I'm exhausted after my first day back at school and the yucky weather has me feeling gloomy.  I've finished my school work and am ready for bed....here are a couple of cards that I did earlier.  Enjoy!


I used the stamp set "Inspired by Nature" and the "poppin' pastels" technique.  To do the technique you stamp the image in versamark and then pop on the pastels with sponge daubers.  It gives the image a watercolor look.


This an even smaller "box in a bag" like the one I made earlier.  Looks are deceiving, but the base of this bag is only about 2 x 3.  I just had a scrap rectangle sitting on my table and wondered if I could make a tiny bag just using scraps and the answer is....Yes!  Yes I can!  Here's hoping I can get some stamping done early tomorrow morning or later tomorrow evening.  Goodnight!

Sunday, March 27, 2011

Bye Bye Vacation!

It's back to work tomorrow....I know that our school year will go quickly from now on and the rest of the year will fly by!  Here are a couple of the last cards I got made during vacation--I found this cute ribbon tutorial.  You tie knots in the ribbon--it makes for a very interesting look!


I've been seeing these butterfly easel cards all over stamping blogland--I gave one a try, but it was soooo tiny I don't think you'd be able to do more than sign your name on the inside....but it would make a cute gift card!


Well it's off to bed--I have an early start tomorrow morning!

Saturday, March 26, 2011

Can't stop the sliding!

I'm taken with the slider card--here's another one that I did that I like even better than the first (and I liked that one a lot).  I got the idea for the front and slider of the card from a card in the spring mini catalog.  It uses the adorable  Eat Chocolate set from the mini catalog. (The card sample I used was on the same page--page 30).

Front of the card----pull up on the candy bar and here's what you see:

It's so fun to make it slide.....all I want to do is play with it!

Here's a beautiful card that I cased from Teneale Williams--she does gorgeous work "down under."

I was limited to the supplies that I had, but I love the sweet simplicity of the Sweet Summer Sale-a-Bration set.  You have just a few more days (ends March 31) to get this set free with a $50 order!  I'm sending an order in soon so let me know if you are interested!  

Friday, March 25, 2011

Here Comes Peter Cottontail....

It's time to think about Easter....I'm forever not getting cards made until it's too late to send them and get them there in time.  So I've been taking advantage of my spring vacation to create.  Here are a couple of things I've been working on:

Baskets and Blooms Easter Card

I saw this idea on Inking Idaho and here's my take.  I purchased Becky's tutorial (one of many I've bought from her) and I can highly recommend them all.  She does a great job giving you pictures and step by step directions....and they are very reasonably priced.  

I used:
  • Stamp Set:  A Good Egg
  • Ink:  Chocolate Chip
  • Ribbon: Baja Breeze Seam Binding
  • Punches:  Scallop Circle, Wide Oval, Scallop Edge, 1/2 circle, tiny flower from Boho Blossoms for beak
  • Accessories:  Square Lattice Embossing Folder
  • Paper:  Pear Pizzazz, Chocolate Chip, Baja Breeze, Pretty in Pink, Whisper White, and Nursery Suite dsp
Petal Cone Die Carrot and Easter Bunny


You just have to love the Big Shot and how easy it makes it for creating cute things!  I got this idea here, but had to change the bunny to something a bit easier.  =-)  I cut the front flap off and embossed the carrot part with the polka dot embossing folder.  Make sure you use sticky tape to seal it shut so it doesn't come undone!  The bunny was created with the scallop punch, heart to heart punch, small and medium oval punches (for face) and the boho blossom punch for the paws.  The details were added with my basic black marker.  Very cute if I do say so myself.  Oops--I forgot the carrot top--the garden green topper was made with the scallop circle and larger scallop from the #2 Scallop Circle die.  (Yep,  I got it.)


Tuesday, March 22, 2011

Slip Sliding Away

Last night I had so much fun making this tiny bag in a box--directions were found here at Crescent Stamping.  I tried it with retired dsp in case it didn't work out!  But as you can see.....adorable!  I can see it holding a few 3 x 3 cards or a small gift.


I also saw this tutorial on Dawn's Stamping Thoughts for a slider candy bar card.  I've never made a slider card before.  With Dawn's help it was quite easy and soooooo cute!
Here it is closed--just pull on the candy bar and......


Love it!  Here's what I used:
Colors--ink/paper:  melon mambo, garden green, so saffrom, marina mist, whisper white
Stamp sets:  A Good Egg, Easter Blossoms (spring mini catalog)

Monday, March 21, 2011

Bubble Gum Fun!

I found the cutest tutorial on YouTube from Creations by Mercedes--it uses the cupcake punch to make a gumball machine!  Adorable!  It's a bit difficult or maybe tedious is a better word to get all the gumballs glued in the machine, but isn't it cute?  If you click on the connection it will take you to the video.  I love the bright colors--rainbow has always been my favorite color!  =-)

Stamp sets used:  Fabulous Phrases
Cardstock Colors:  Daffodil Delight, Glorious Green (retired), Pacific Point, Only Orange (retired), Basic Black and Real Red
Accessories:  White embossing powder, cupcake punch, silver brad, small oval punch, 1 1/4 circle punch, and some heavy weight window sheet.

Sunday, March 20, 2011

On Vacation!!

I'm on vacation this week!  Yay!  That means that I get to make cards in between painting our family room and cleaning a few carpets....and watching basketball of course!  Here's a sympathy card I made using Nature Walk.  You can see more clearly the background made with the clear block on this card.

I used Certainly Celery and Elegant Eggplant for my main colors.  I don't have any eggplant ribbon unfortunately, so the ribbon's not quite like I'd like it.  So I tried something else with the bow--still don't like it!  Back to the drawing board!

Speaking of back to the drawing board.....I took another look at the Engraved Greetings card that I posted earlier this week and was unhappy with--I added a black scallop circle behind the greeting that I restamped using my black Staz-On ink and just attached them on top of my "icky greeting."  Bam!  Now I like it!  It's amazing how just a couple of little tweaks can make or break a card!


Saturday, March 19, 2011

March Stampin' Party

It's always fun when the Stampin Up group that I meet with each month gets together!  I can always count on great conversation and yummy food while spending time with these special friends!  Chris was the hostess and she did not disappoint with her yummy cheesecake pudding cake (can't wait to make it)!  Anyway--here are the cards I demonstrated during the evening:
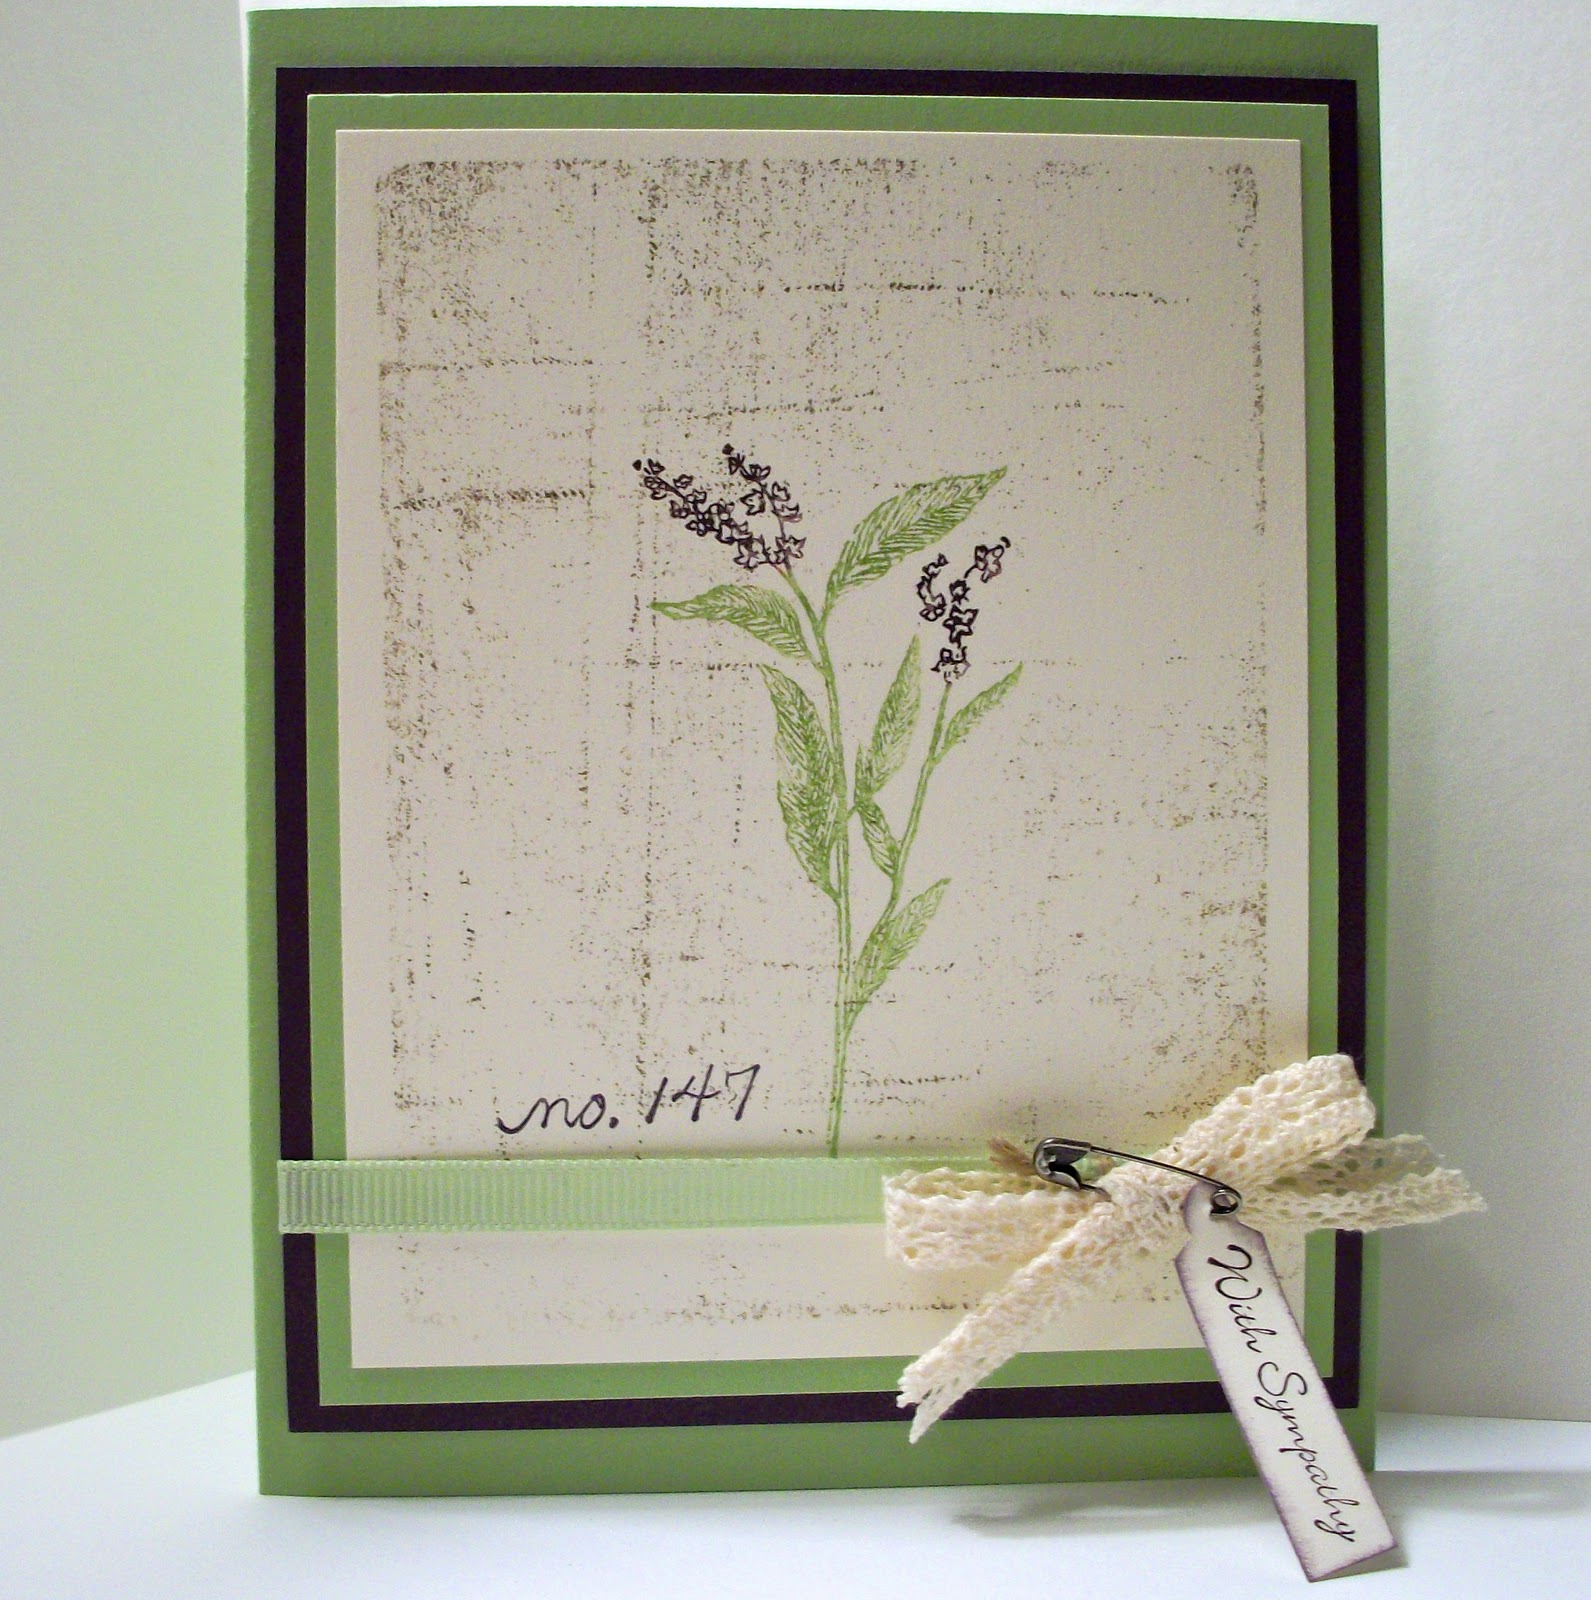
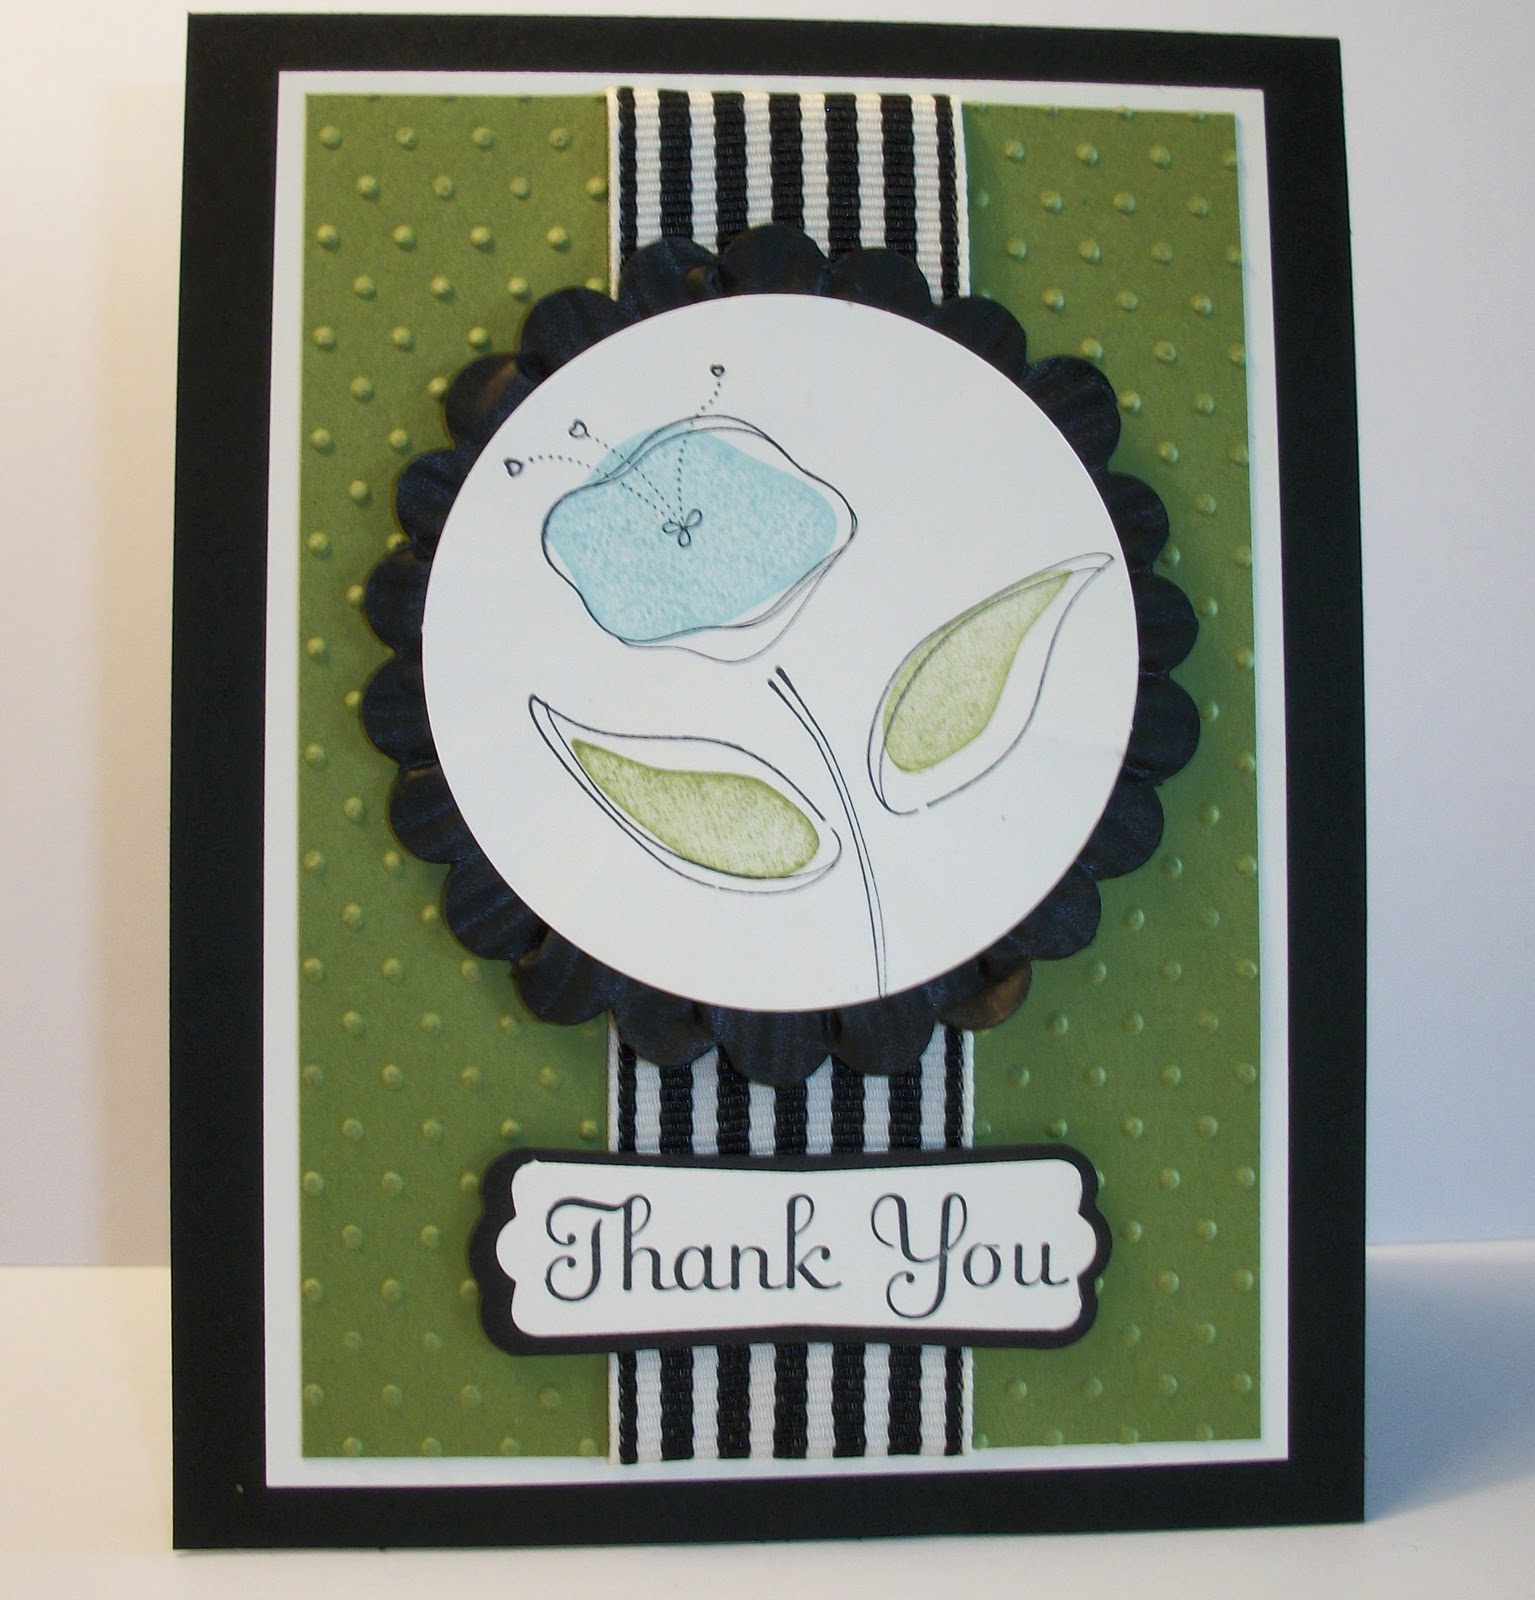
Big Shot Flower


This card used:
•vintage wallpaper embossing folder
•victoria ribbon
•magnetic movers and shapers
•fun flowers bigz die (spring mini)
•sweet stitches designer big buttons (spring mini)
•modern label punch
•A Word for You
   The card base is very vanilla with edges sponged in soft suede.  The flower is also very vanilla with edges sponged in soft suede.  Baja breeze is the color of the blue panel that is embossed with the vintage wallpaper folder.  I layered the flower and attached the button threaded with a thin strip of baja breeze CS.  The sentiment is stamped in chocolate chip, punched with the modern label punch and layered on a chocolate chip piece cut out with the big shot movers and shapers die that is just a hair larger than the punch.  I saw this card out in blogland and case'd it from Cristena Bagne at gettingcrafty.com.  Thanks Cristena!
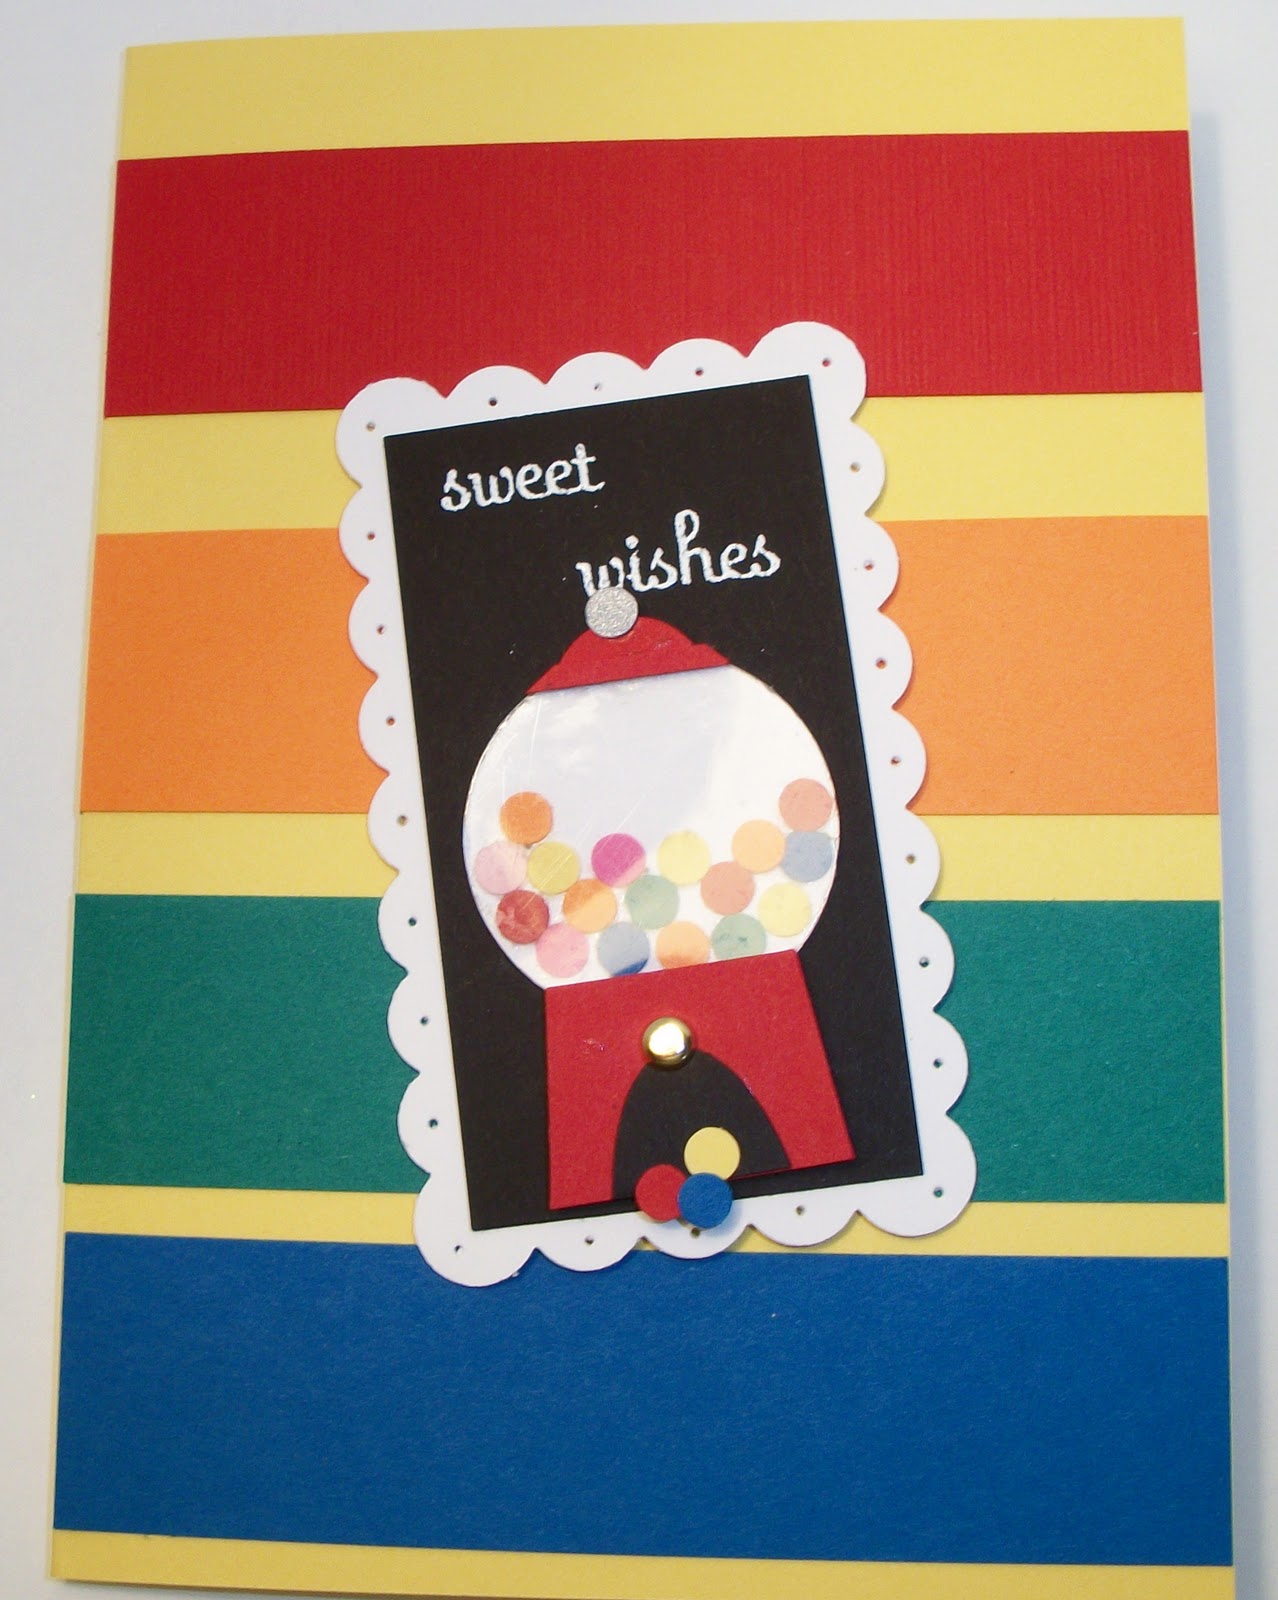
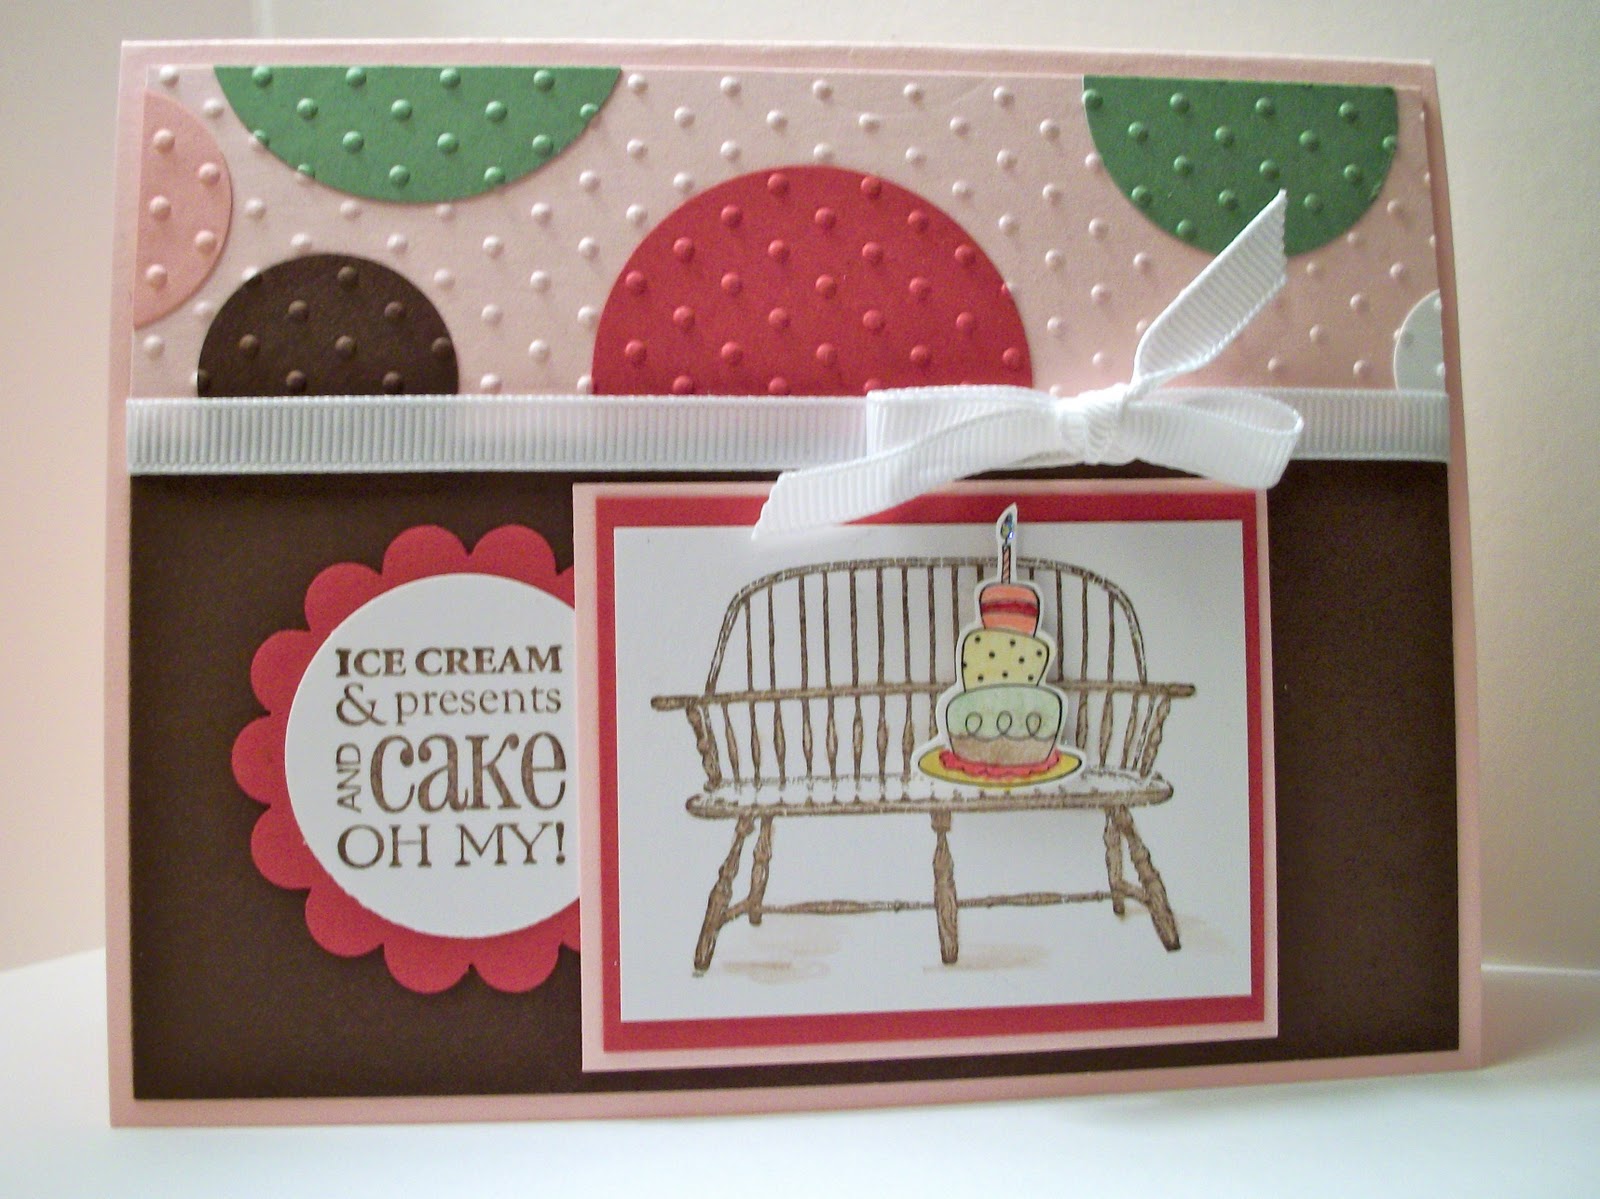
Have a Seat


This card is similar to one that I already posted earlier with a link to one of my favorite blogs--Inking Idaho.  I saw this card with the top section on another blog (Kendra's Creative Corner) and loved what she added to the original idea!
Here's what I used:
Stamp Sets: Have a Seat, Birthday Bliss
All of my circle punches (I punched out rose red, pretty in pink, wild wasabi, whisper white, and chocolate chip circles)
White grosgrain ribbon
Pink Pirouette CS base
Blender pen, Early Espresso and Chocolate Chip ink (plus a variety to color the cake)
Scallop Circle punch
Perfect Polka Dot Embossing Folder
I cut out the cake and popped it up on the bench with dimensionals.  I also added a tiny bit of glitter on the flame of the cake.
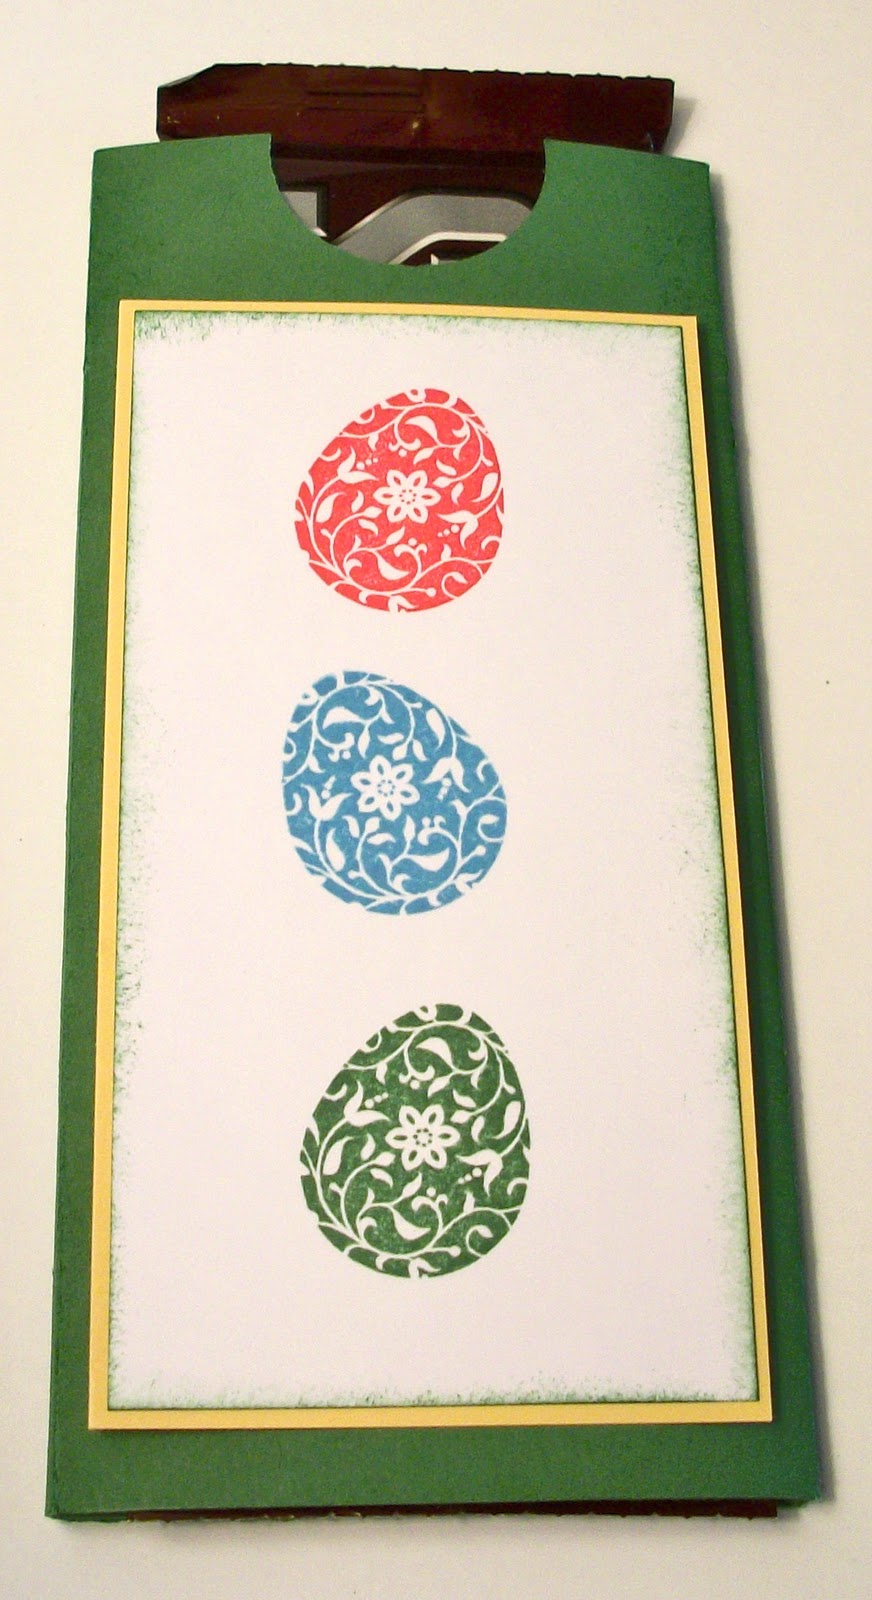
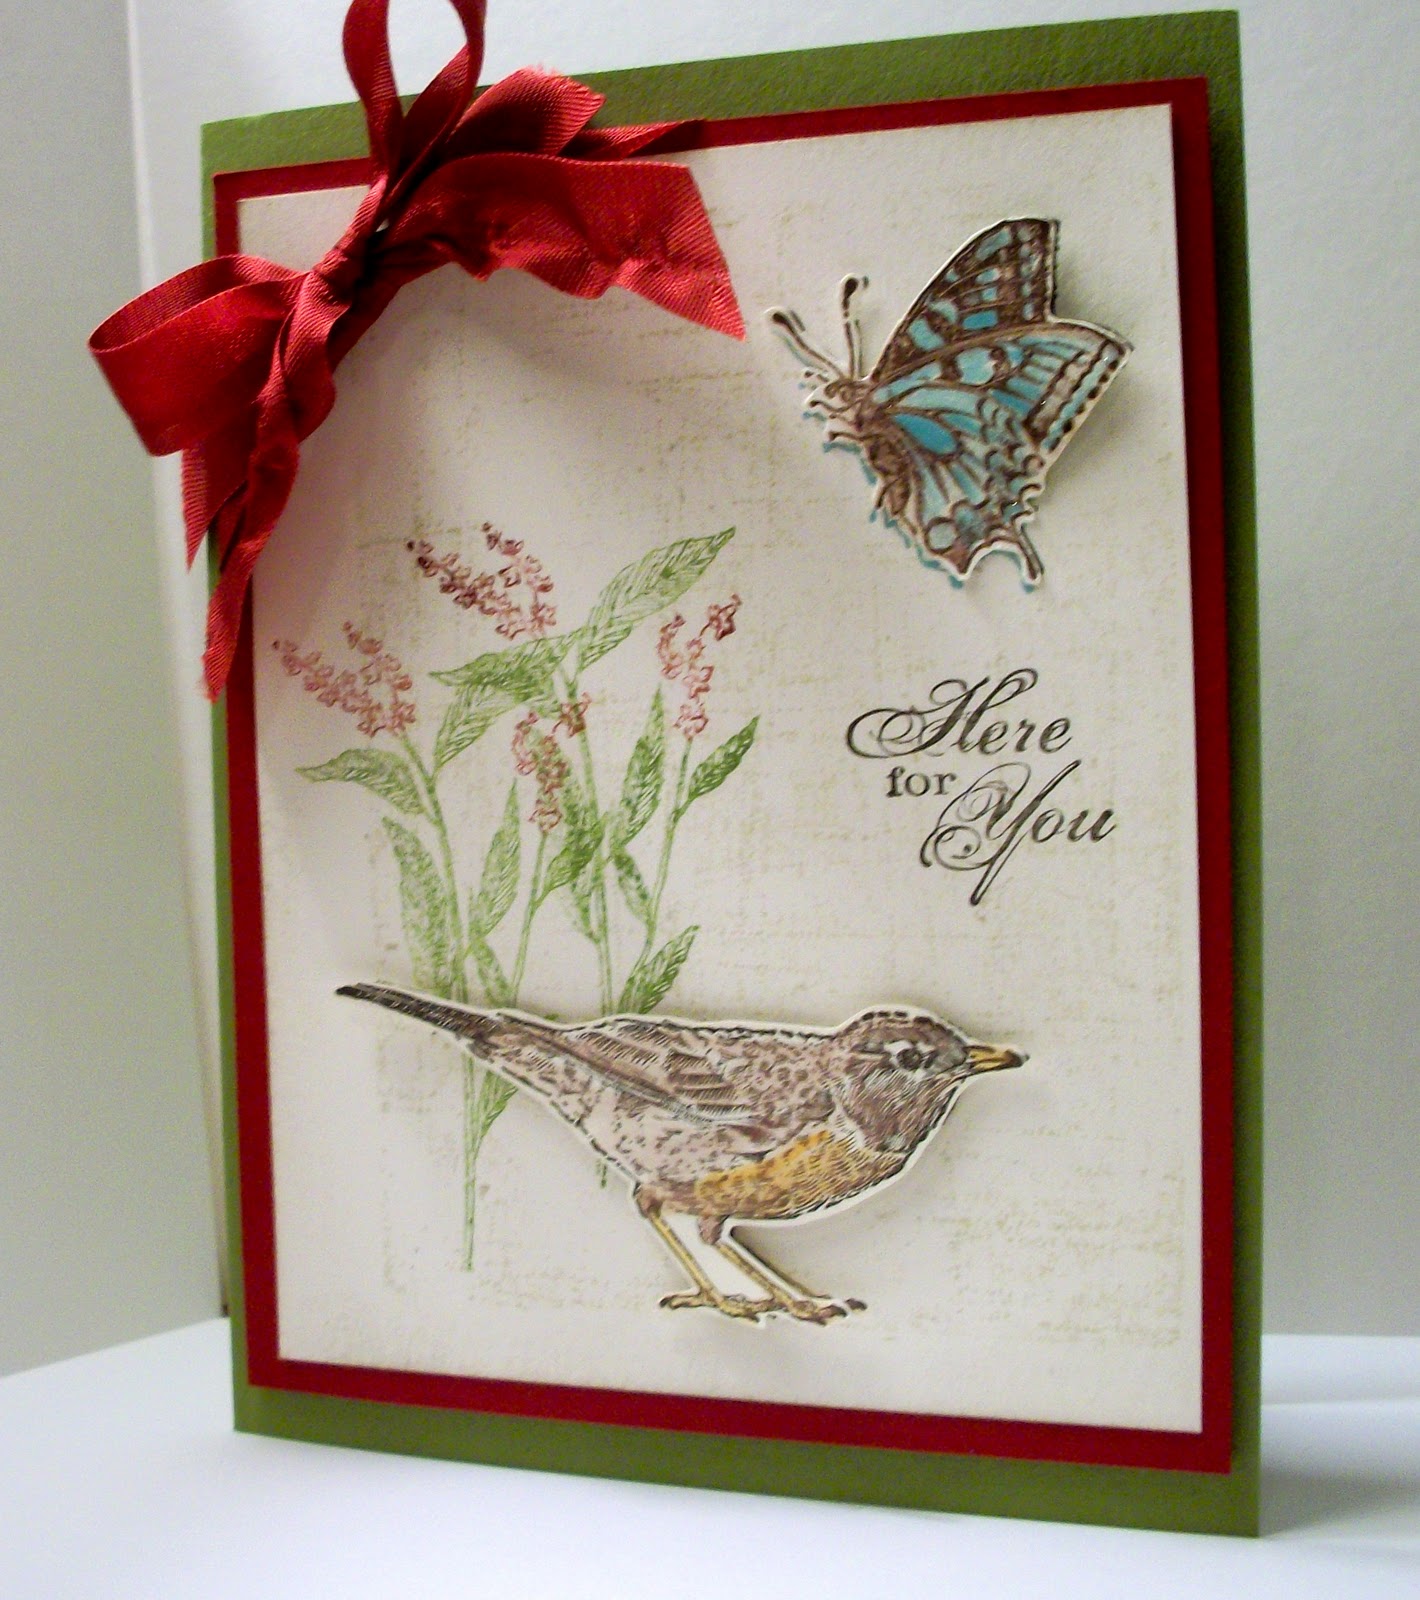
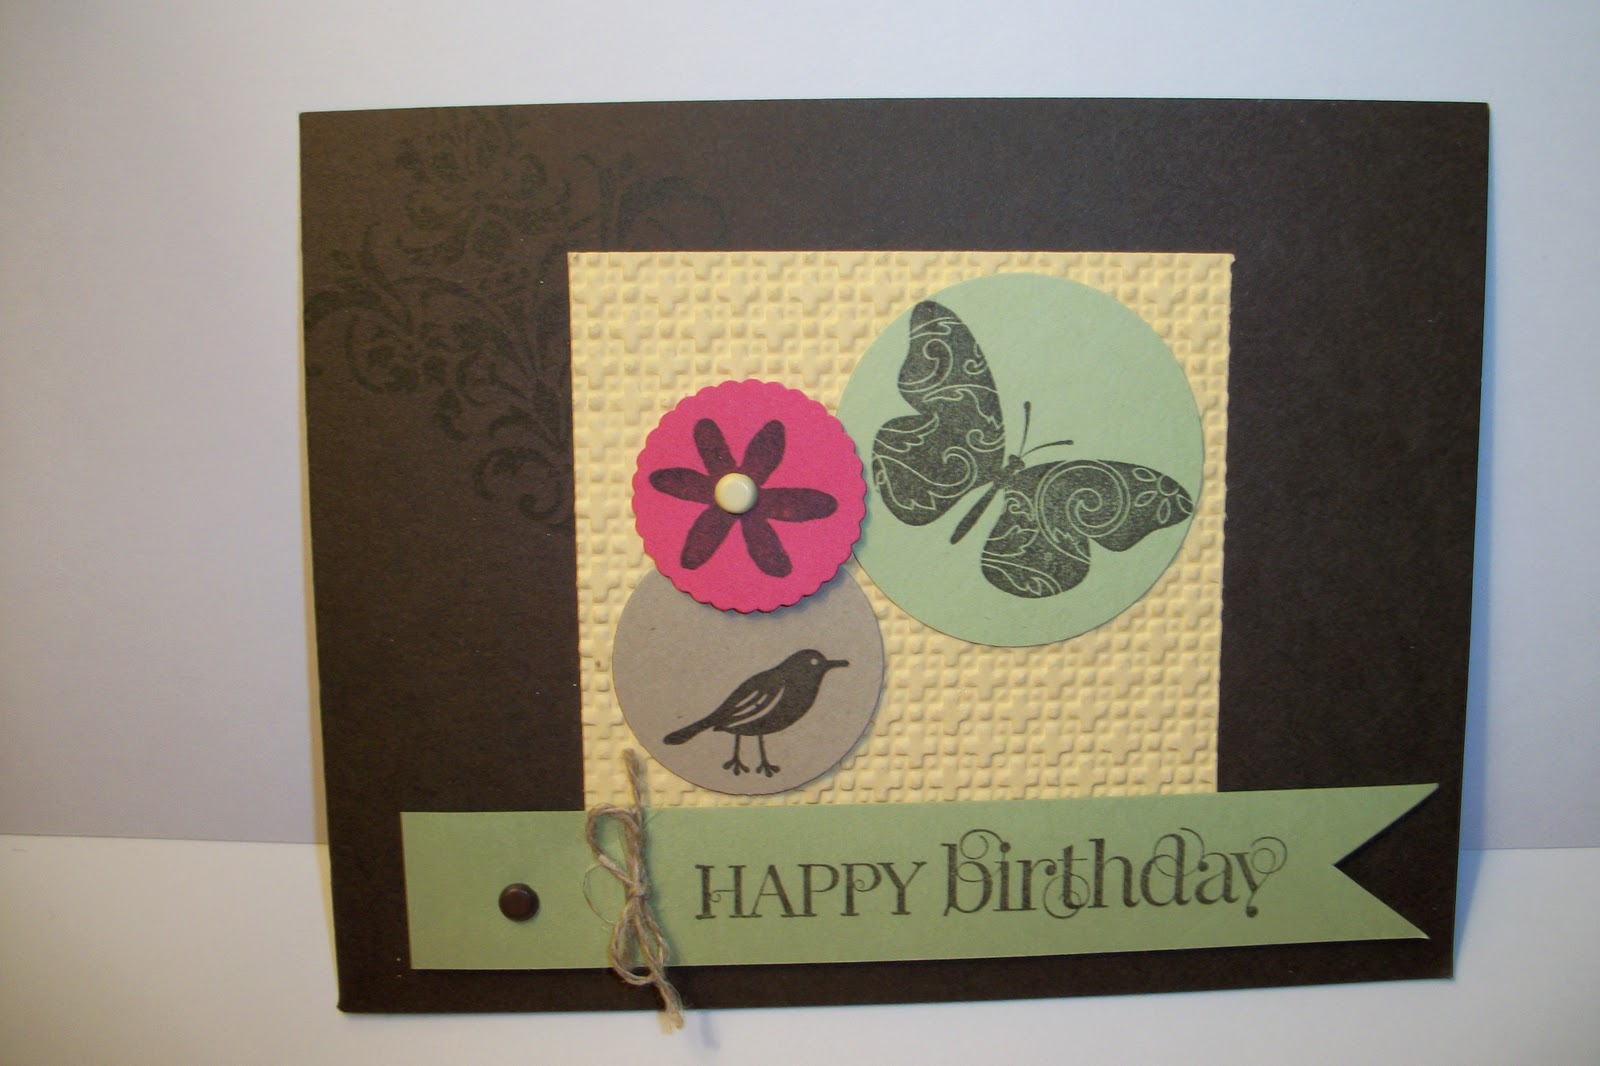
Nature Walk


I love this set, but have really struggled to come up with cards using it--especially those using more than one image from the stamp set.  As I demo'd this card my butterfly was baja breeze blue and there just was something I didn't like about it--so everyone suggested I stamp the butterfly in chocolate chip and add the touch of blue--so here it is.  Still not sure about it....maybe I should just leave the butterfly off and have the ribbon go across the top.  Here's what I used:
Stamp Sets:  Nature Walk, Friends 24/7
Cardstock/Ink:  Old Olive, Cherry Cobbler, Early Espresso, Chocolate Chip, Peach Parfait, Baja Breeze
Crumb Cake, Very Vanilla
Accessories:  Cherry Cobbler seam binding ribbon, blender pen, dimensionals
The other thing I did that you perhaps cannot see is the background behind the stamped scene--I inked up my clear block and stamped it right in the center of my paper.  This creates a sanded looking background.
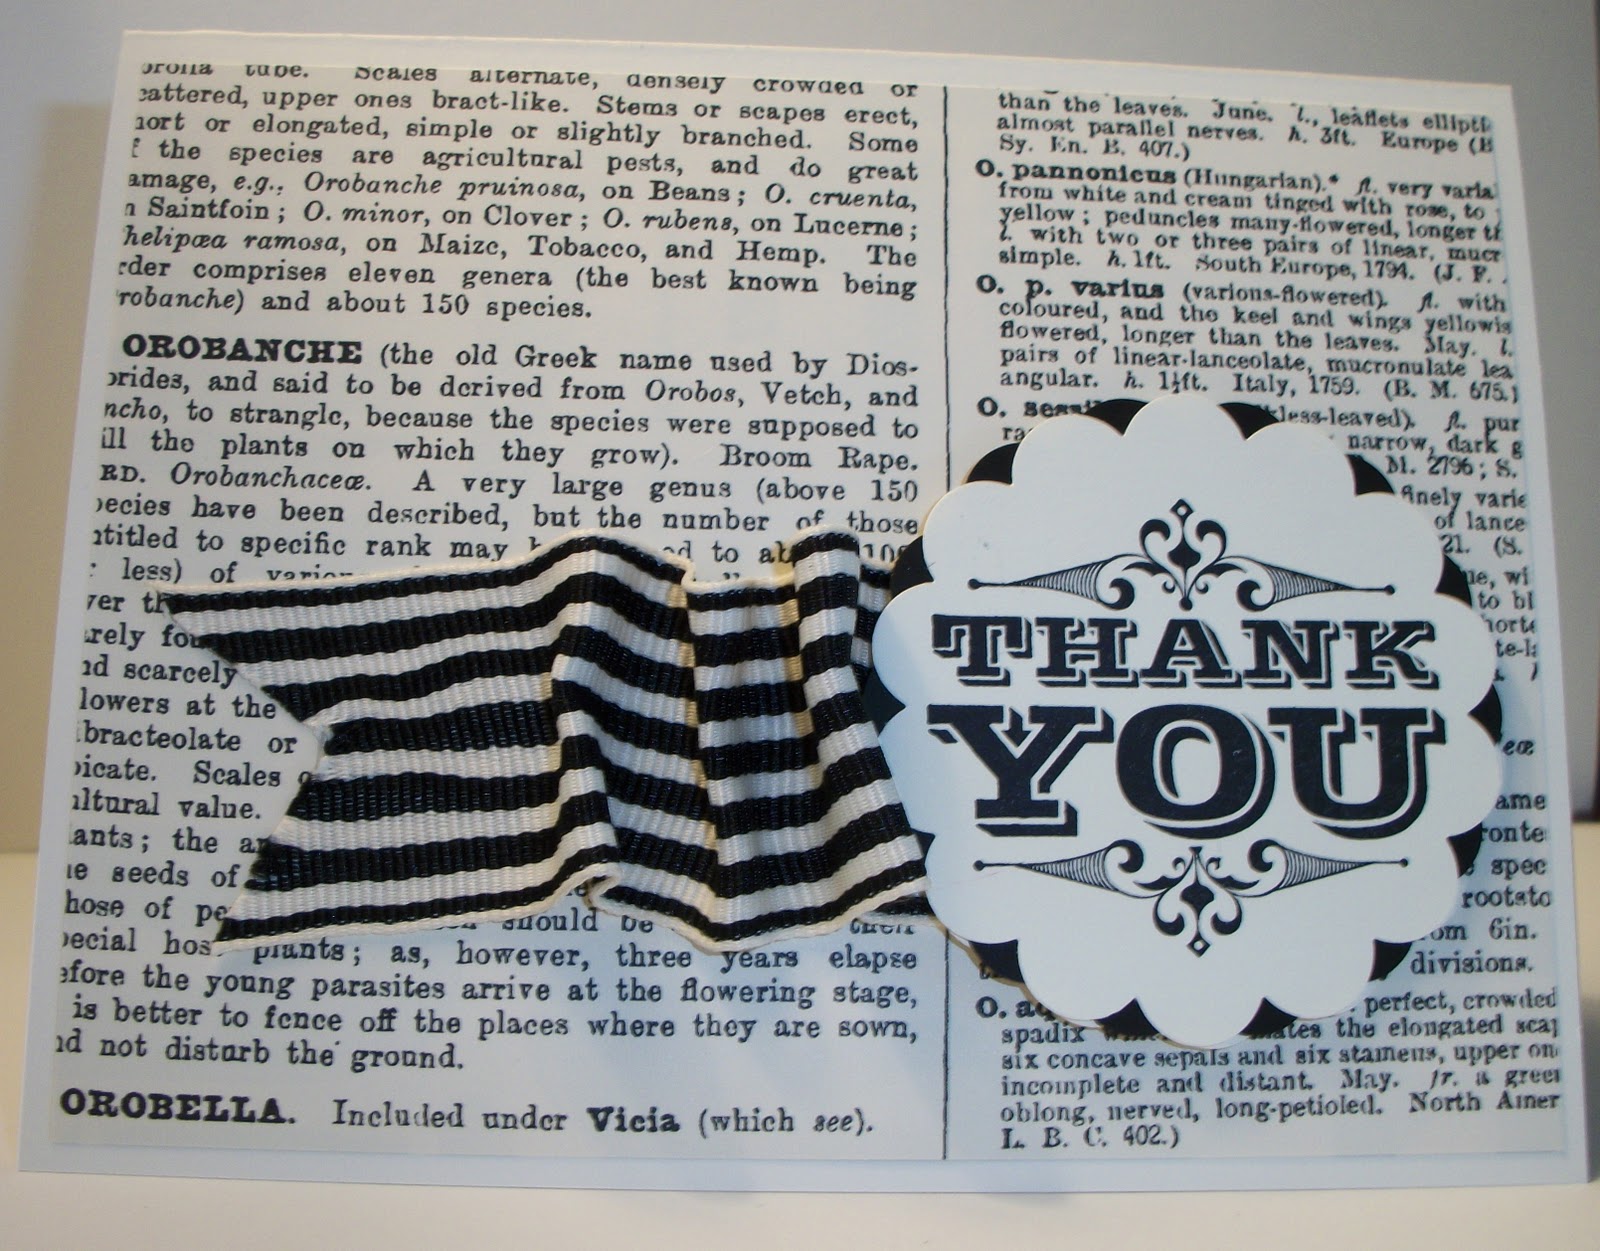
Pooh & Piglet


Oh my goodness!  Aren't these adorable??  They are totally case'd from Eve's Offcuts at evesoffcuts@blogspot.com.  She (and I) used the owl punch, bird punch and word window punch to create both Pooh and Piglet.  The stamp set used with this is Party This Way.  I created the card base with my large square scallop die (real red for Pooh and Rose Red for Piglet) and then the card which is whisper white is mounted on tempting turquoise for Pooh and old olive for Piglet--attached to that is a 3 3/4 x 7 1/2 inch piece of whisper white.  I created the clouds using a punched scallop circle as a mask -- sponged with bashful blue.  If you weren't able to attend our party and have any questions please let me know!

Tuesday, March 15, 2011

Happy Thoughts!

This card just makes me happy!  I'm not terribly excited about the mistake I made in the upper right when I stamped the little flower, but all in all--it makes me think spring....maybe even summer!  Ha!  I used the stamp set: For Everything and a bunch of retired paper.  =-)  I'm feeling a bit better...hopefully I've turned the corner!

Monday, March 14, 2011

Sick Time = Cards Made

Greetings from snowy--yes, snowy Kansas!!  Tonight when the precipitation began it looked like one of those old bean bag chairs had been opened up and the tiny styrofoam pellets were raining down upon us!  It quickly turned to some of the biggest, wettest flakes I've seen in awhile.  The 1/2 inch we were supposed to get became 1 1/2  - 2 inches of snow and the radar looks like there is more to come!  On another note--I have been sick all weekend.  No sleep due to my sore throat pain and today when I got up it was even worse.  Now the ibuprofen isn't even touching the pain.  Enough of my whining!  When I wasn't napping I tried to catch up on some stamping that I've been wanting to do!  I'm demonstrating at an upcoming party and it's so hard to decide what to do--let's see I have 14 possibilities that I've made and can only pick 4...what a dilemma.  I typed this post last night and am home from school today sick.  I'm just back from the Dr. and then waiting for my prescription to get filled.  Hopefully I'll see some results SOON!  I guess I'm a big baby!  Anyway--here are two of my rejects for now....

I really like this set, "Engraved Greetings" that you can get free for a few more weeks with the Sale-a-Bration!  However, as I look at this photo I realize I'm going to have to break down and buy another Big Shot die--the scallop circles #2.  The Thank You scallop is just screaming for a little black in the background of it!  I also will use my black Staz-On ink the next time I make this card--the SU classic black just has too much of a purple tinge to it for my taste.  Anywho--here's what I used:
Stamp Set:  Engraved Greetings
Paper:  Very Vanilla and Newsprint dsp
Accessories:  2 3/8 " Scallop punch, 1 1/4" Black Striped Grosgrain

I really like the looks of this card, but once again since I didn't have a large scallop circle--I made my own trim by punch a strip with my scallop punch, running it through my crimper several times and then gluing it around the back of my image.  It looked great initially--but if you see the card up close you can see all the marks where I folded the trim around through the top circle.  BOO!  I'm going to have to get that Scallop Circle #2 die.  I do love that I found an idea to use my Magnetic Movers and Shapers without the whole large die so now I can cut the backgrounds for my favorite punches!  Yay--can't wait to share this with the stamping group tomorrow.  Here's  what I used:
Stamp Sets:  Thank You Kindly (can get free with SAB), Awash with Flowers
Paper:  Basic Black, Very Vanilla, Old
Ink: Basic Black, Old Olive, Baja Breeze (I stamped off)
Accessories:  Modern Label Punch, Punch Windows, 1 1/4 Black Striped Ribbon, Perfect Polka Dots embossing folder
I'm off to rest and hopefully get better!

Wednesday, March 2, 2011

New Blog Look and more birthday.....

How do you like the new look to my blog?  I'm really liking it!  My daughter worked on it for me from North Carolina this morning!  Thanks Amy!

Today's card is one of the five that I made for the class I had for the older women (you know....Disaster with a capital D).  Yep--this one was pretty easy....I thought.  I sure learned a. lot.  I'm heading back for the followup visit this Sunday.  Unfortunately I think many decided stamping wasn't "their thing."  I'm sorry!   =-(

This was cased from a card that Kriss Huels' took to Leadership for a swap--I thought it was great, but she used the SAB set Bliss, which I didn't have at the time, so I raided all my sets looking for a butterfly, appropriate flower and little bird....After some trial and error this is what I came up with.  Here is Kriss' original version.